💡 No-Code Solutions
Payment Links
Creating and managing payment links is quick and easy with your dashboard. Follow the steps below to set up your payment links effectively.
Step 1: Log in to the Dashboard
Step 2: Access Payment Links
- After logging in, locate the side menu on the left-hand side of your dashboard.
- From the menu, select Payment Links. This will open the Payment Links section where you can view, manage, and create new links.
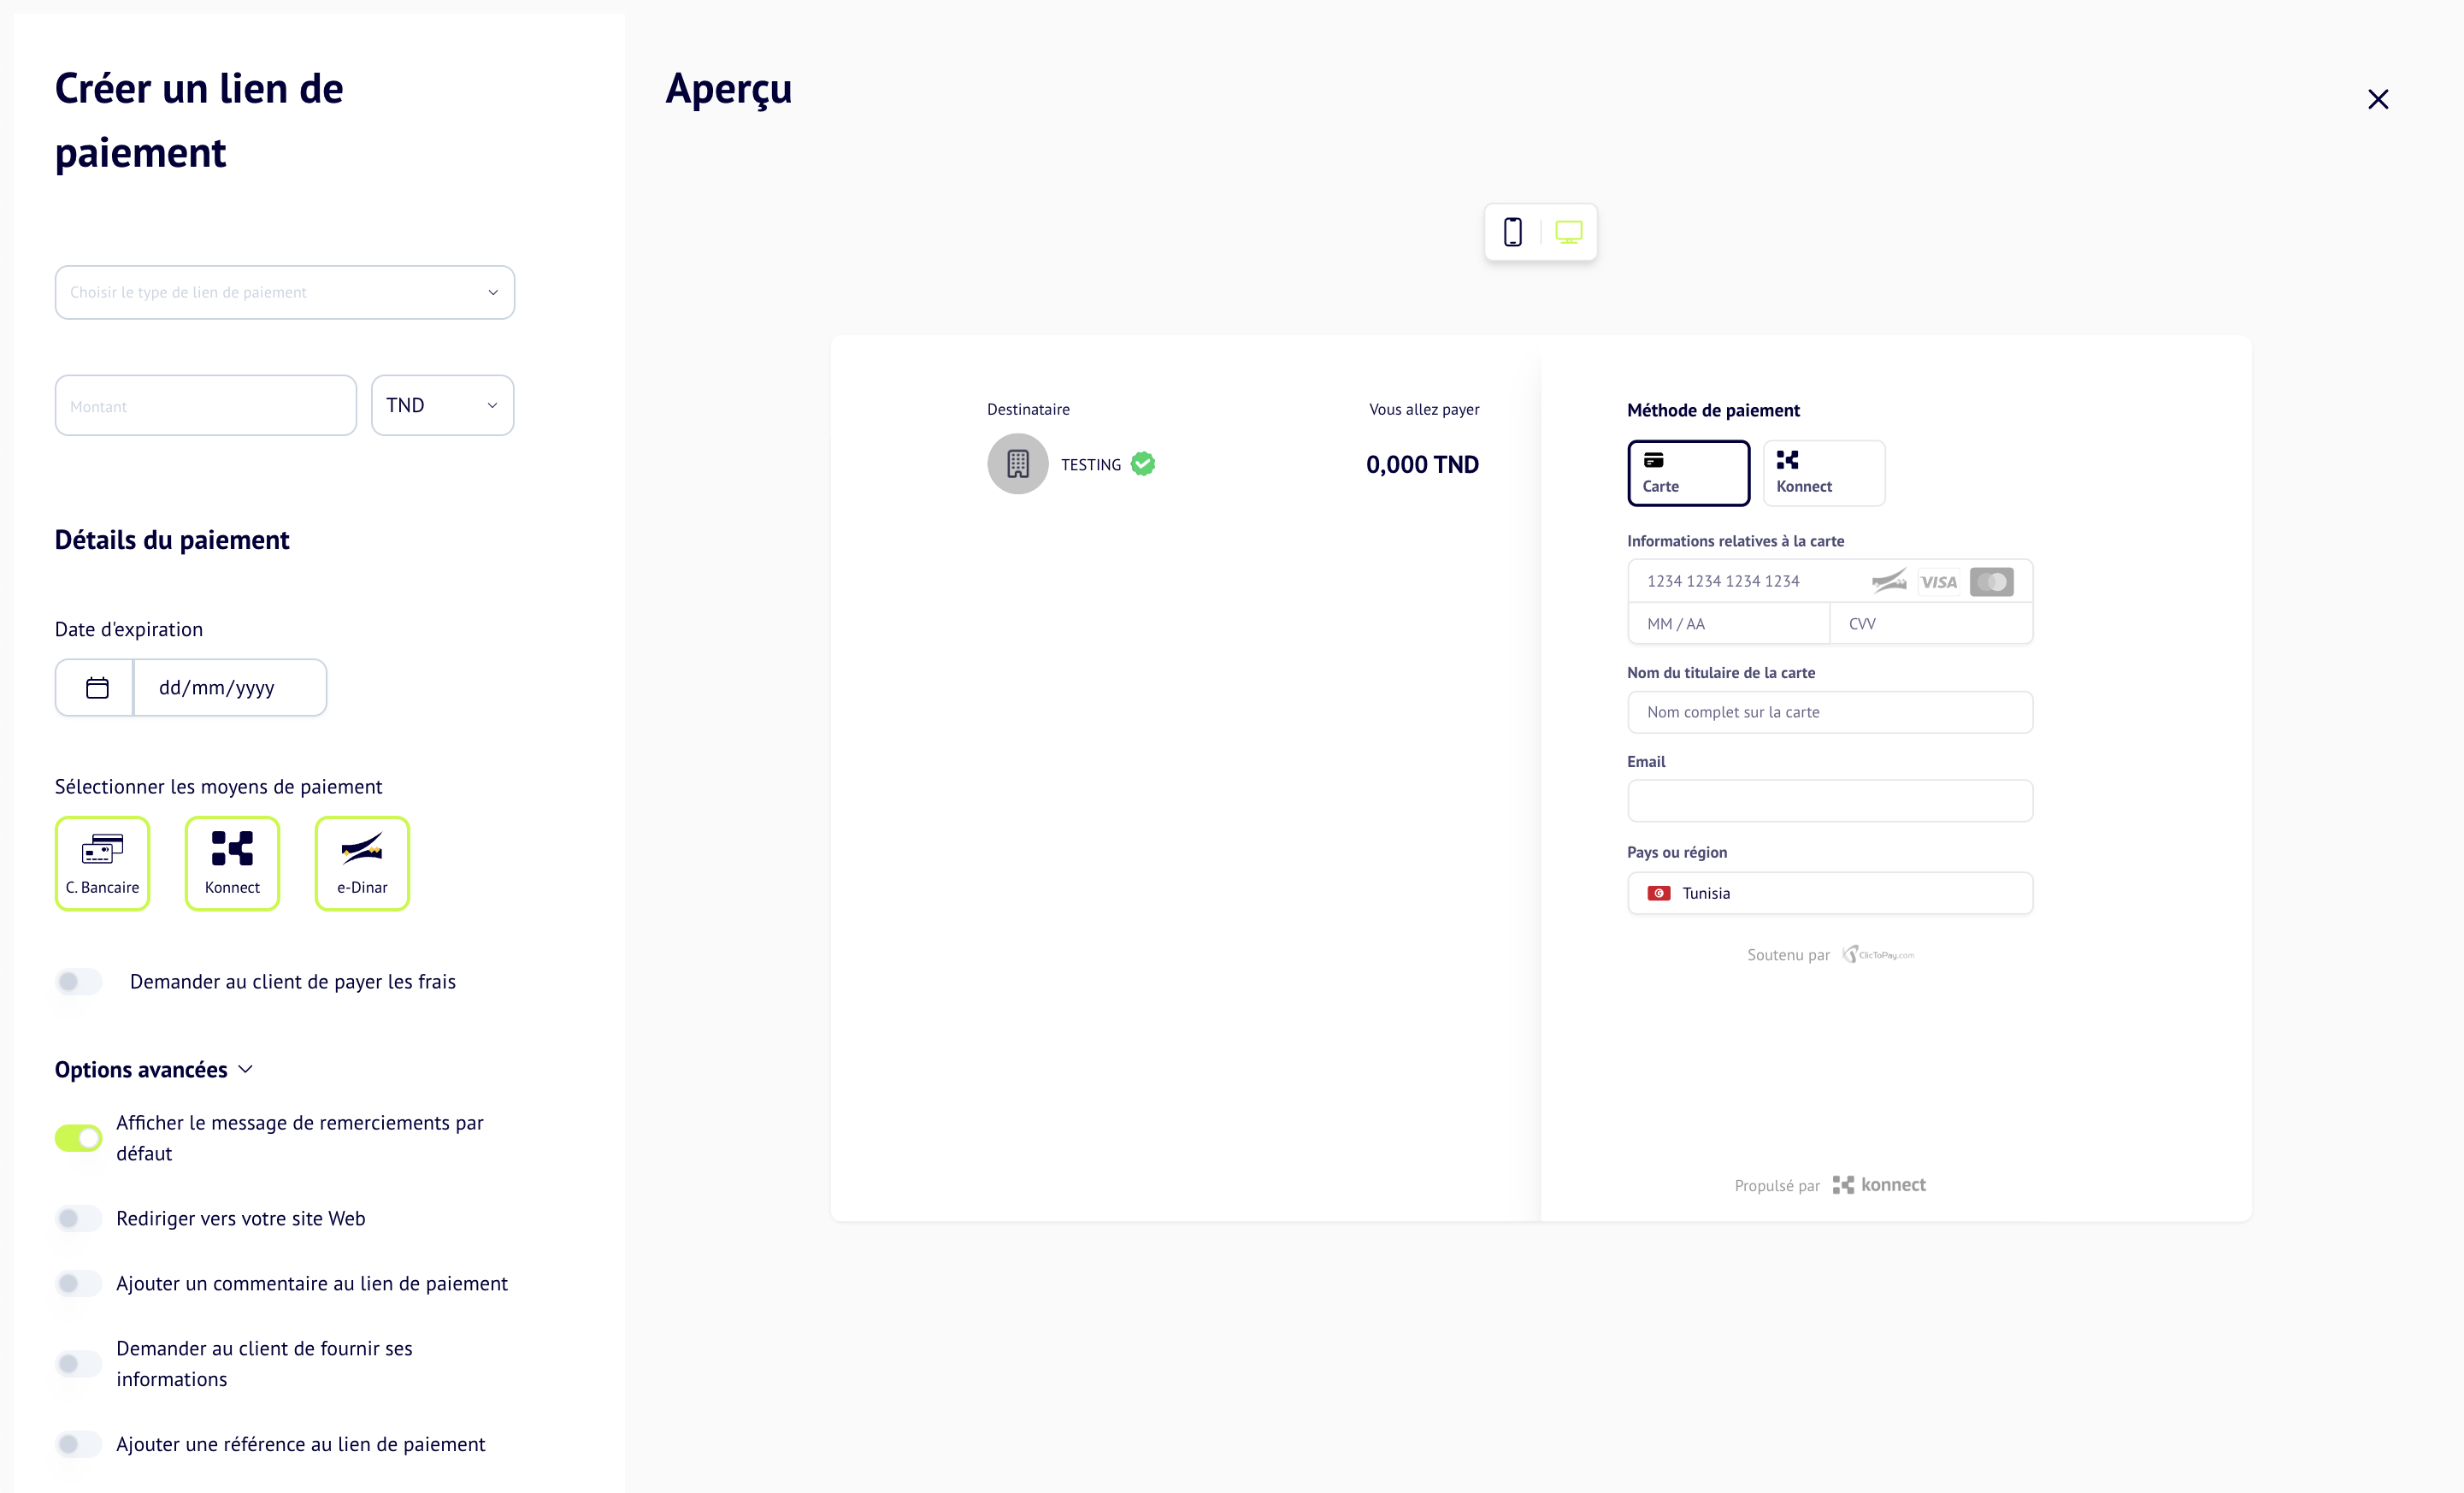
Step 3: Create a Payment Link
-
Click on the Create Payment Link button in the Payment Links section.
-
Fill in the following details for your payment link:
- Payment Link Name (Optional): Provide a name to help you identify the link later.
- Amount: Enter the amount you wish to charge your customers.
- Validity Date: Set an expiration date for the payment link. After this date, the link will no longer be active.
- Max Number of Usages: Specify how many times the link can be used for payments.
- Payment Methods: Choose the payment methods you want to allow for this link (e.g., Credit Card, Debit Card, Bank Transfer, etc.).
-
Review the details and ensure everything is accurate.
-
Click Generate Link to create the payment link.
Step 4: Share the Payment Link
- Once the link is generated, it will appear in your Payment Links list.
- You can copy the link by clicking the Copy Link button or share it directly via email or messaging platforms.
Step 5: Manage Payment Links
- In the Payment Links section, you can view all your active and expired links.
- Use the Edit option to update details of an active link or the Delete option to remove it.
- Monitor the status of each link, including the number of times it has been used and total payments collected.
By following these steps, you can efficiently create and manage payment links to streamline payment collection for your business.